AWeber Campaigns Automations let you set Campaign tags when an email is opened or a link is clicked.
AWtomator Tag Events enhance AWeber Campaigns Automations by allowing you to perform additional actions when a special trigger tag is applied.
This makes it simple to do all kinds of ninja stuff for people who open an email, like:
- Move or copy them to a new list
- Distribute a coupon
- Unsubscribe them immediately
- Add them to a Facebook Audience
And a whole lot more besides…
Here’s how to do it.
Step 1: Create a Tag Event
Firstly, we create a Tag event, which is an event triggered when a subscriber has a specific AWeber Campaigns tag.
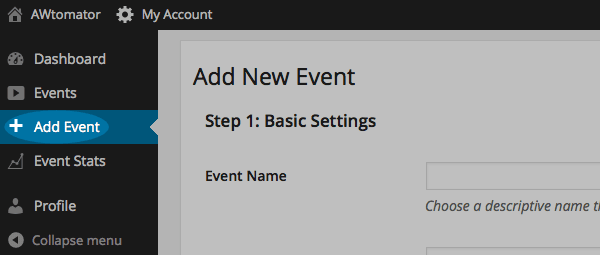
To do this, login to AWtomator and click “Add Event” from the left hand sidebar.

Then, simply select TAG EVENT as the type and follow the wizard to set the actions you wish to perform.
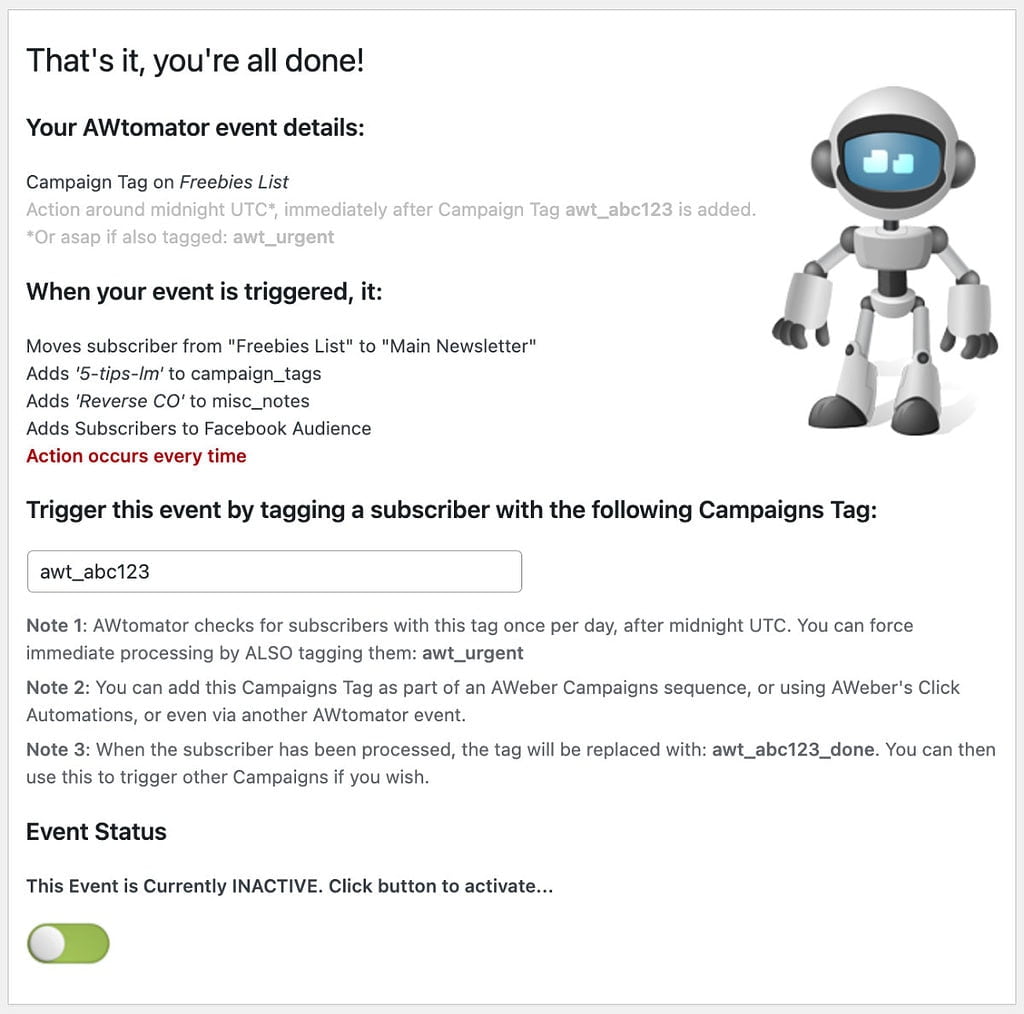
You’ll end up with an event like this:

Note that each tag event has a unique trigger tag (“awt_abc123″ in this example).
If you set the unique trigger tag on a subscriber, AWtomator will fire the Tag Event action on them.
Step 2: Add the event’s trigger tag using AWeber Campaign Automations
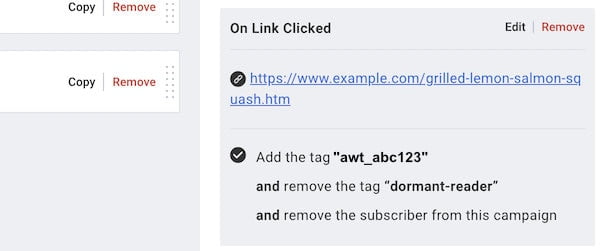
In this example, we will use AWeber Click Automations to add the Tag Event’s trigger tag to the subscriber when the email is opened.

As you can see in the image above, we will set the “awt_abc123” trigger tag when the grilled lemon salmon link is clicked, as well as performing some other click actions!
That’s it! Now, when the link is clicked, the trigger tag will be set and AWtomator will process the Tag Event’s action when it next checks your subscribers for trigger tags.
When the subscriber has been processed, the trigger tag will have ‘_done’ appended to it (so in our example: awt_abc123_done). You can then use this new tag to trigger other Campaigns if you wish.
How will you use this in your business? Leave your comments, questions and ninja use case ideas in the comments below… and if you are not yet an AWtomator user, but want to try this out for yourself, take a free trial of AWtomator below.

