Zapier is an automation service that lets you connect web apps together using workflows called “Zaps”.
Now you can easily integrate your existing Zapier workflows with AWtomator’s powerful segmentation and automation for AWeber, which takes the native Zapier to AWeber integration to the next level.
Here’s how to set it up.
Step 1: Setup an Integration in AWtomator
We need to get Zapier and AWtomator talking to each other, so the first thing we need to do is to hop over to AWtomator and create a new Integration, choosing Zapier as the Integration Type.
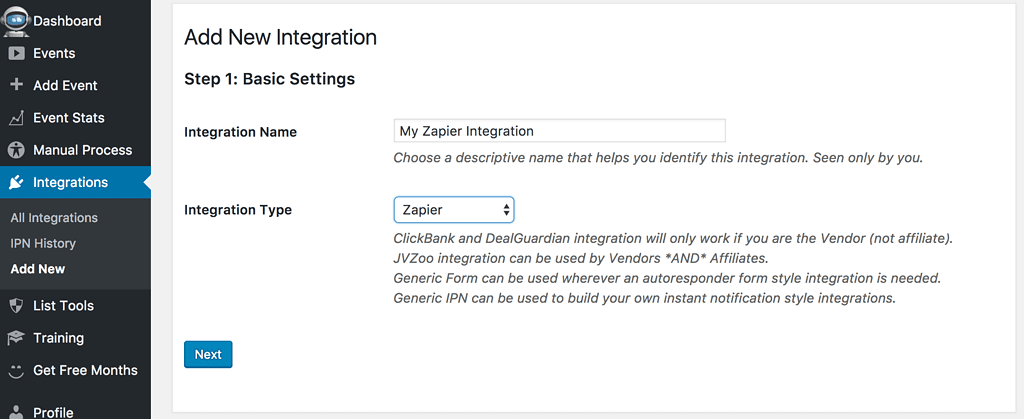
Next, you need to set a “Secret Key” to secure your integration. The Secret Key is a phrase or random series of characters which your integration and Zapier will share. This secures your integration from anyone who does not know the secret.
Choose your own unique key.
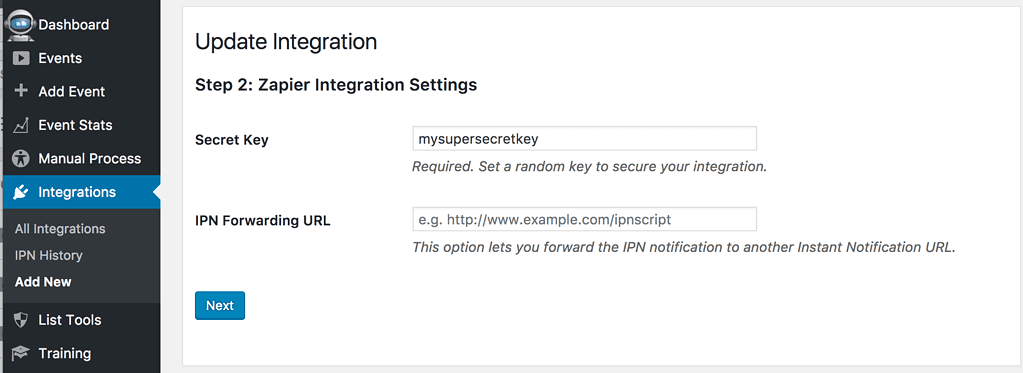
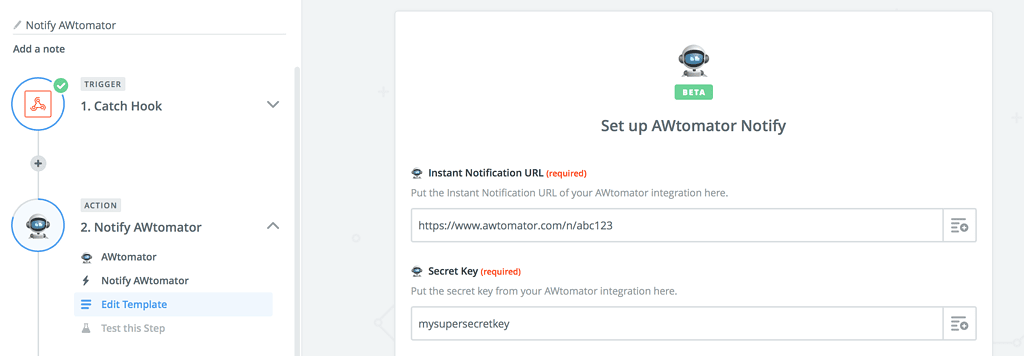
Finally, we copy the Instant Notification URL and secret key ready for step 2, and click the link to activate the Notify AWtomator app in Zapier:
Step 2: Create a Zap in Zapier
You can connect all kinds of web apps using Zapier, using what is known as a “Zap”. In this example, I’m using a Zapier webhook, but you can trigger the zap from GoToWebinar, Wufoo forms, Survey Monkey, Google Sheets, Eventbrite, Bigcommerce, SurveyGizmo, Shopify and many, many more.
Simply create the Zap, setting your preferred source as the trigger, choose the Notify AWtomator app as the action, and configure it with the Secret Key and Notification URL from step one.
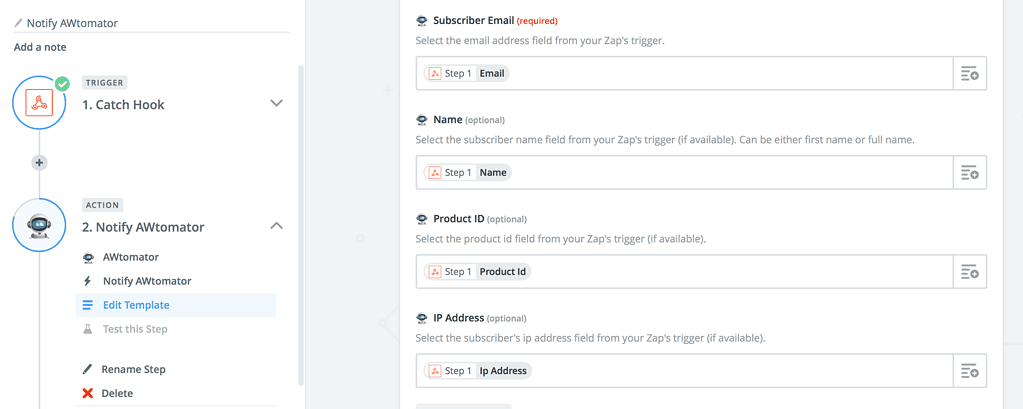
Now select the fields to import from our trigger app. In the example below, we are catching data from a webhook, but you could just as easily grab data from a spreadsheet row using the Zapier Google Sheets integration or data from the thousands of other web apps Zapier supports.
Only Email is required, the other fields are optional and may or may not be available from your chosen trigger app.
Finally, we hit test and then check the IPN History of your AWtomator integration to make sure the zap worked ok.

That’s all the heavy lifting done… just one final step…
Step 3: Tell AWtomator what to do when your Zap is triggered
With the integration side of things setup, AWtomator will now get a notification any time someone triggers your Zap. So now we need to tell AWtomator what to do when a notification comes in.
To do that, you simply set up an IPN Event in AWtomator, which is an event triggered by a notification.
IPN events let you perform all the usual AWtomator actions (move, copy, tag, change followup, unsubscribe, start Campaign etc) – as well as add new subscribers to your list – whenever an integrated system sends us a notification.
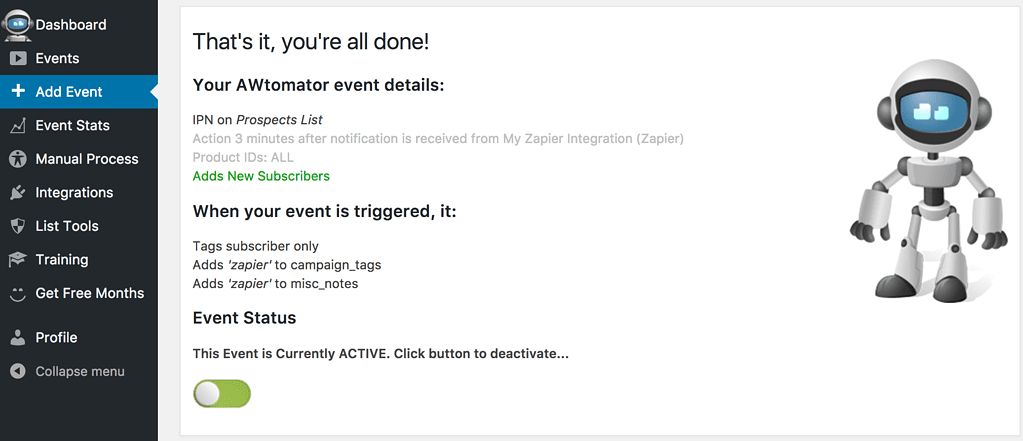
For example, in the screenshot above, you can see that we’ve created an IPN Event that adds the subscriber to our Prospects list whenever our Zap fires.
It also tags them to start an AWeber Campaigns sequence called “zapier” (see also ‘How Do Tags Work in Aweber?‘)”.
You can set up as many IPN Events as you need – all linked to your Zapier integration – and fire them selectively depending on the product ordered.
So, you can:
- add new subscribers automatically to a list based on the item ordered
- deliver a bonus “consumption” email sequence to buyers of one product
- send upsell offers to buyers of another product
- move or copy subscribers from one list to another
- unsubscribe them from a list
- start an AWeber Campaign sequence
- segment them with a tag so you can broadcast to them in the future
- and a whole lot more!
And if the system you want to Zap from doesn’t give you the detail you need – no problem – because you can repeat steps 1 and 2 to create as many separate Zapier integrations as you need, each driving its own set of IPN events.
If you use Zapier and AWeber, why not take a free trial of AWtomator and try this out for yourself!
Leave your comments and questions below!

