WooCommerce is an elegant, simple and highly customisable ecommerce store plugin for WordPress, and the most popular eCommerce platform on the web, powering over 39% of all online stores.
Now, WooCommerce offers a paid WordPress plugin which lets people join your AWeber list when they buy a product via your WooCommerce store…
But wouldn’t it be great if you could also:
- Trigger an AWeber Campaign containing “consumption content” designed to increase engagement with the product purchased and keep refund rates down.
- Tag new or existing users for product specific broadcasts, such as updates, on a single list rather than inflating your AWeber bill with subscribers on multiple lists
- Take different actions, depending on whether the customer is brand new or an existing subscriber
- Add/Move/Copy buyers to different lists based on the product(s) they have ordered – without any opt-in or confirmation emails – perfect for upsell reminders or cross-sell offers
- Follow-up or tag customers who abandon orders to try and close the sale
- Remove or tag people who cancel/refund their orders from your customer list
- Or a combination of all of the above… for all of your WooCommerce Sites
Well, the good news is that you can now do all of this using AWtomator – the behavioral dynamic response add-on for AWeber. And it works right alongside the WooCommerce AWeber Plugin (if you use it), so if you want new subscribers to be able to choose whether they join a list or not, then you can still do that too.
Here’s how to set it up…
Step 1: Setup an Integration in AWtomator
We need to get WooCommerce and AWtomator talking to each other, so the first thing we need to do is to hop over to AWtomator and create a new Integration, choosing WooCommerce as the Integration Type.
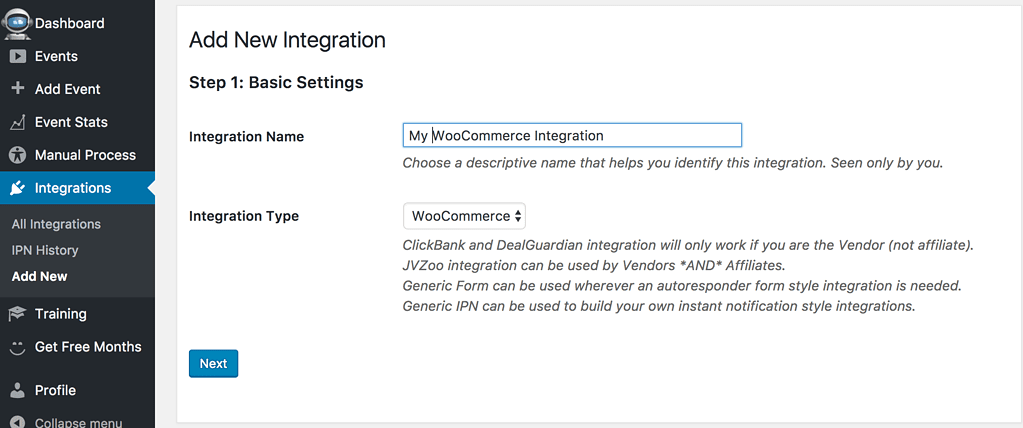
Now, we set a “secret”, which is a phrase or random series of characters which your integration and WooCommerce site will share. This secures your integration from anyone who does not know the secret.
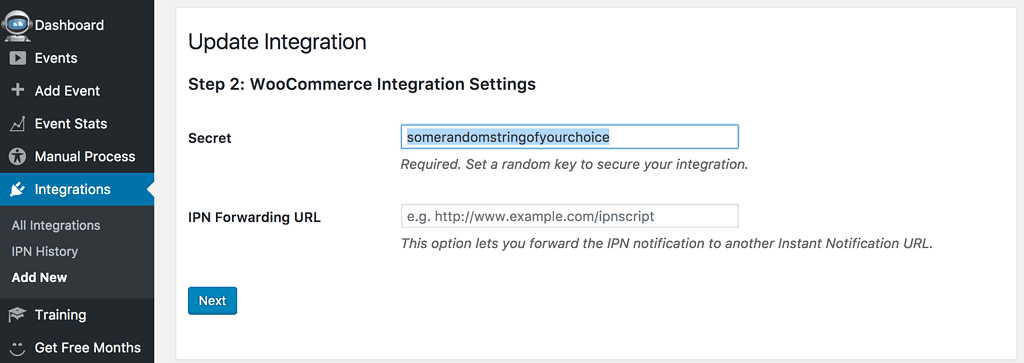
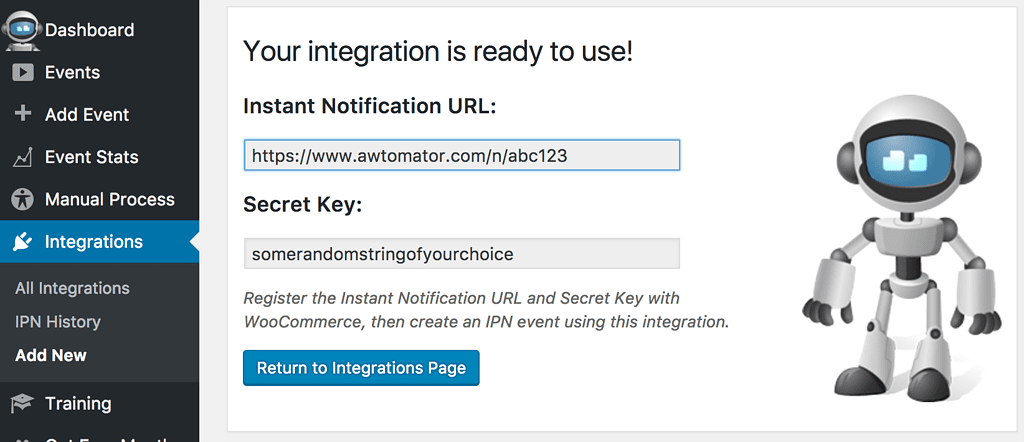
Finally, we copy the Instant Notification URL ready for step 2:
Step 2: Create a Webhook in WooCommerce
Next, we need to tell WooCommerce to contact AWtomator via the Instant Notification URL whenever an order is created.
To do this, we simply go to: WooCommerce > Settings > API > Webhooks, click the “Add Webhook” button.

You then enter your webhook settings:
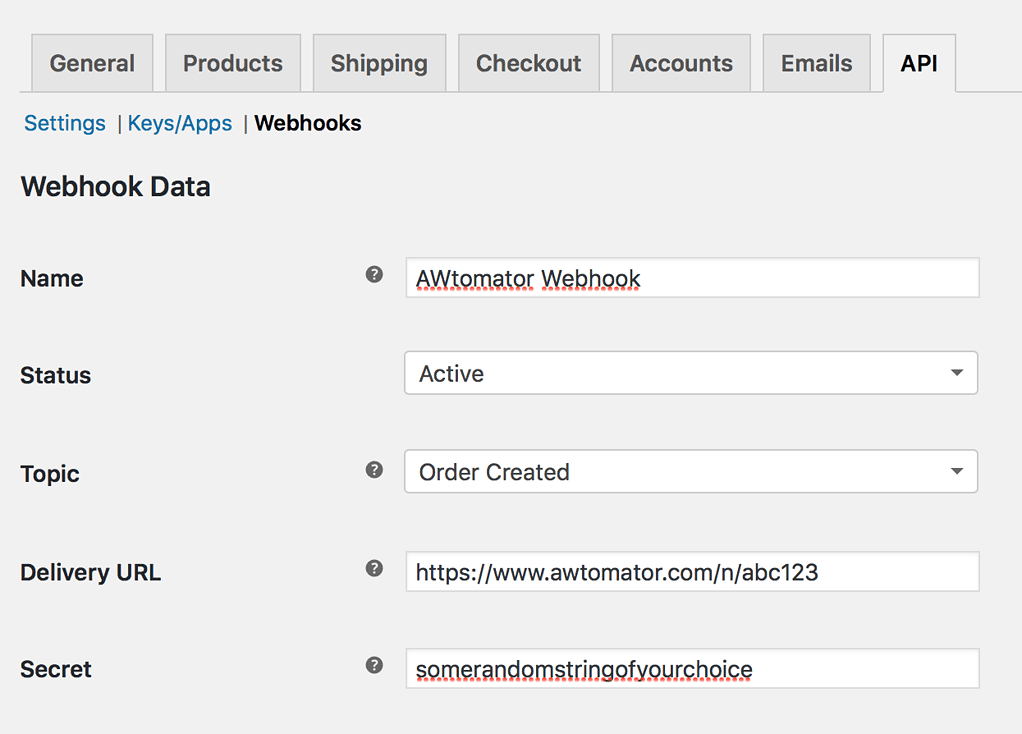
- Name: This can be anything you like
- Status: Active
- Topic: Order Created (See Pro Tip below)
- Delivery URL: Set your AWtomator Instant Notification URL from step 1
- Secret: Set the secret from step 1
You can watch a WooCommerce video on creating your Webhook here.
Or if you use the WooCommerce Subscriptions module, choose the “Subscription Updated” Topic.
Step 3: Tell AWtomator what you want to do when a sale is made
With the integration side of things setup, AWtomator will now get a notification any time an order changes status in your WooCommerce store.
So now we need to tell AWtomator what to do when a notification comes in.
To do that, you simply set up an IPN Event in AWtomator, which is an event which is triggered by a notification.
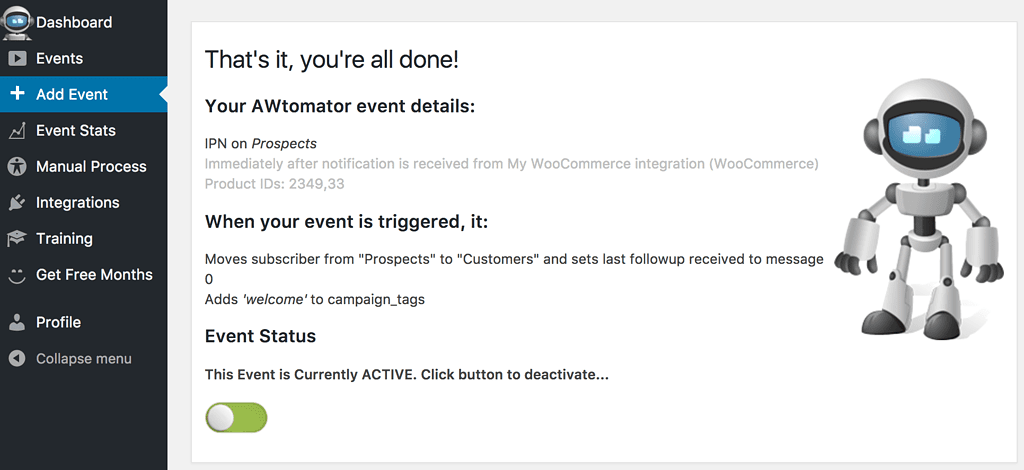
In the screenshot above, you can see that we’ve created an IPN Event that copies the subscriber from our prospect list to our customer list whenever products 2349 or 33 are ordered successfully.
It also tags them to start an AWeber Campaigns sequence called “welcome”.
You can set up as many IPN Events as you need – all linked to your WooCommerce integration – and fire them selectively depending on the product ordered.
So, you can add new subscribers automatically based on the item ordered, deliver a bonus “consumption” email sequence to buyers of one product, send upsell offers to buyers of another or tag customers so you can broadcast to them in the future…
To process a non-purchase status for a specific product, you can also use order status in combination with product ID, e.g: 2349-cancelled, 33-refunded
You can see the product IDs that your integration is sending to your IPN Events by checking the IPN History.
The following custom fields might be the most useful when adding a subscriber:
order_number, customer_id, view_order_url, note, is_vat_exempt, currency, shipping_methods
How will you use this? Leave your comments and questions below!
If you use AWeber, why not take a free trial of AWtomator and try this out for yourself!

