Imagine how much more responsive your list would be if you could target your broadcasts to people who had actually expressed an interest in a certain topic…
Well, in this tutorial, I’m going to show you a way you can segment your subscribers using AWtomator, so that you can laser target your broadcasts as if you had somehow read your subscribers mind…
Overview
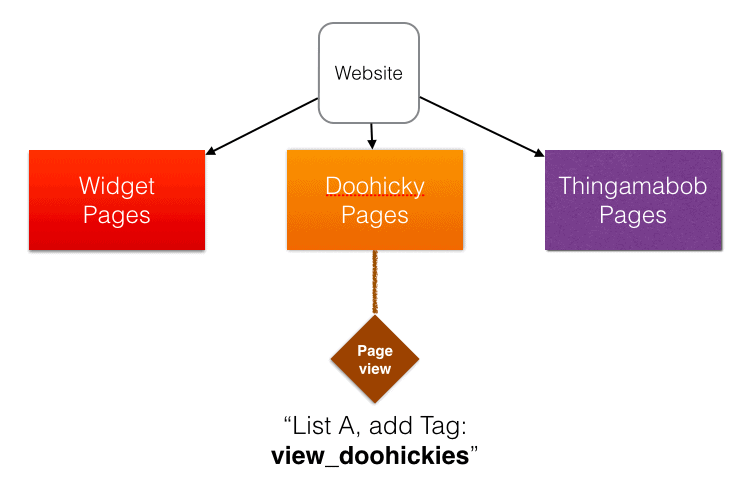
For this tutorial, we are going to imagine that you have a website that has three main topic areas: Widgets, Doohickies and Thingamabobs, and you’d like to target broadcasts to people who have shown an interest in Doohickies.

What we can do is to create a Pageview Event that tags subscribers as liking Doohickies, so that we can later target our broadcasts to them.
We can then put that that Pageview event on one or more pages that indicate a deep interest in Doohickies – such as our Doohickey pricing or options pages.
Step 1: Create the Pageview Event

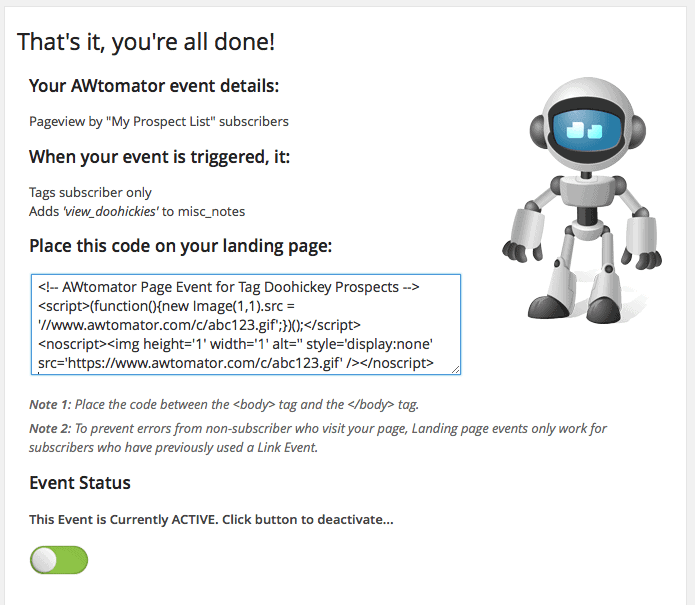
Firstly, we will set up an AWtomator Pageview Event that tags subscribers with the tag, “view_doohickies” and add the page view code to our key Doohickey web pages.
If you send a lot of Doohickey broadcasts, you can set the event to delay the tagging by a few days to make sure that they aren’t eligible for a Doohickey broadcast right after they look at pages relating them.
See the “How Do I Tag Subscribers With AWtomator?” tutorial for detailed steps on how to setup events.
Important Notes
Both Video and Page View events rely on AWtomator being able to identify the AWeber subscriber currently visiting your web page.
There are a number of ways you can feed this information to AWtomator, depending on your skill level and website / funnel software.
PRO: Set a global Javascript variable called “awt_email”
If you know the email address of the person on the page (e.g. they are logged in) then you can set a global Javascript variable called awt_email before the page event code snippet.
For example:
<script>window.awt_email='[email protected]'</script>
MODERATE: Add a URL parameter
If there isn’t an awt_email variable set, AWtomator will then look at the page URL to see if there is an email set using the “awt_email”, “email”, or “e” query parameters.
For example:
https://www.yoursite.com/page/[email protected]
Many funnels add an email parameter automatically when they redirect the user from the lead capture form to the content.
DEFAULT: Use an AWtomator Link Event
If you haven’t made the subscriber’s email available using the methods above, then AWtomator will try to identify the subscriber by cookie or ip address.
These will be set if the subscriber has used an AWtomator Link Event on that device or at that location at some point in the past.
To ensure your subscriber is identified as reliably as possible, we recommend inserting a link event as your list’s Success Page URL.
See our Pageview Event Best Practice tutorial for more details.
Step 2: Create a Segment in Your AWeber List

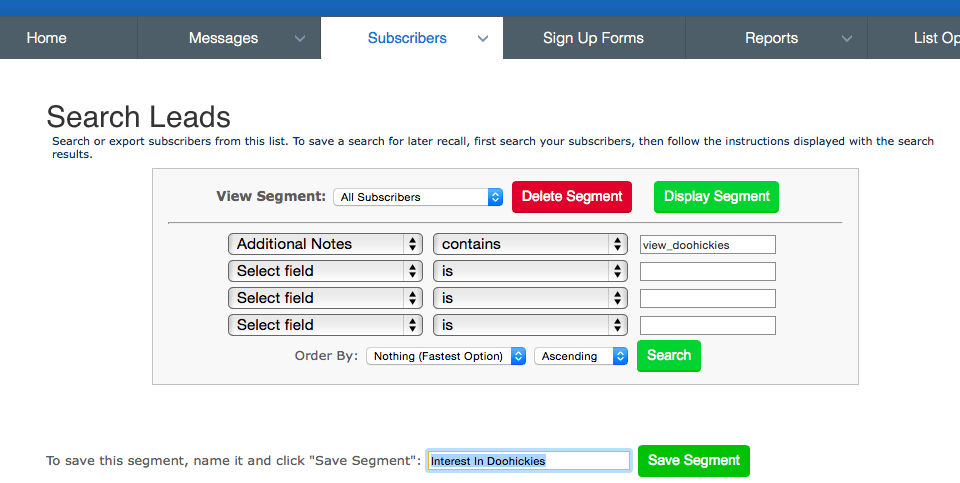
Now, create a segment in your AWeber list that contains subscribers with the “view_doohickies” tag. In the image above, you can see we’re calling the segment “Interest in Doohickies” and we’re including subscribers whose additional notes field contains the “view_doohickies” tag.
Because you can set multiple tags, the field search criteria should be “contains”.
For step by step instructions on creating a segment in AWeber, see this AWeber tutorial.
Step 3: Send all Doohickey broadcasts to your new segment

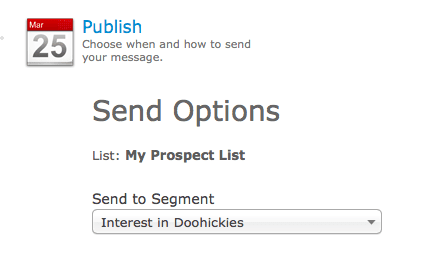
Now, you can simply select the “Interest in Doohickies” segment whenever you send a broadcast about Doohickies and your broadcasts will automagically reach those subscribers who are most interested in your Doohickies.
And, of course, you can repeat the steps above as many times as you need so that you can effectively segment your list according to the things your subscribers are most interested in.
AWtomator can also trigger AWeber Campaigns, so you can also use this technique to trigger an automated sequence as well as segmenting for broadcasts.
Please leave your thoughts below…
