Table of Contents
Note: AWeber has now retired legacy follow ups, so this tutorial is archived.
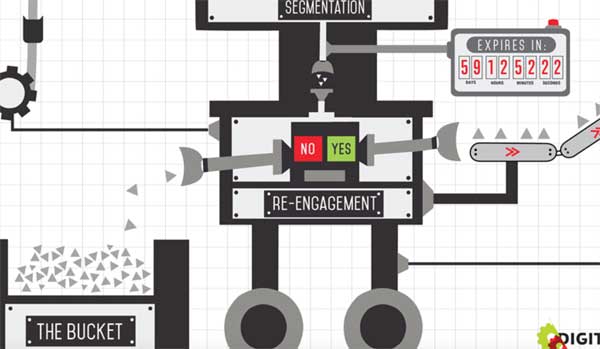
Ever since Ryan Deiss posted the Email Marketing Machine process map that his company, Digital Marketer, uses in all their projects, it has become the model for email best practice.
In a previous blog, I showed how to create the “Engagement / Ascension” part of The Machine – which is also known as the “Customer Value Optimization” process – using AWtomator and AWeber.
Today, I’ll show you how to use AWtomator and AWeber to create the reengagement / win back process part of “The Machine”.
Overview
Here is what you’ll end up with at the end of this tutorial.
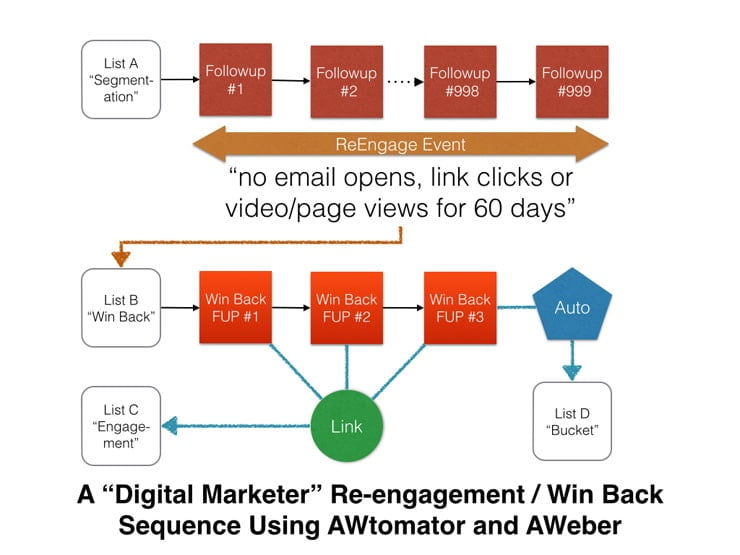
The key to the reengagement / win back sequence is the AWtomator ReEngage Event, which monitors your list for subscriber engagement (opens, clicks, page views and video views) and is triggered if a subscriber hasn’t engaged with your list for a specified period.
As soon as a subscriber stops engaging, they get moved from your main segmentation list (List A) onto a new list which contains your reengagement or win back sequence (List B).
Your reengagement series encourages subscribers to engage somehow – for example, to get a new lead magnet, view a video or something like that.
If they click the link event in one of the win back followup emails, they are moved to the engagement sequence the win back offer relates to (List C).
If they don’t click any links in the reengagement / win back sequence, then they are scooped up by the automation event and placed onto the “Bucket” list (List D).
Here’s how to set it all up…
Step 1: Set up Your Win Back and Bucket Lists
You’ll need to create two new lists in AWeber: one for your reengagement or “Win Back” sequence (List B) and one for your “Bucket” list (List D).
Your “win back” list can have any number of AWeber LEGACY followups, but generally a sequence of three emails is enough to know if you can get some engagement… (Or not.)
In each of your reengagement emails, include an AWtomator Link Event to the page you are encouraging them to visit. The Link Event will then move them out of the reengagement series and back into one of your engagement / ascension funnels.
(Or, if you prefer to have AWeber stats tracking – use an AWtomator Tag Event instead of a Link Event and use AWeber Click Automations to set the trigger tag.)
The “Bucket” list doesn’t have any followups – it is simply a list you can broadcast general affiliate offers to in the hope of making some return – and you don’t really mind about engagement / delivery too much.
Step 2: Set up the ReEngage event
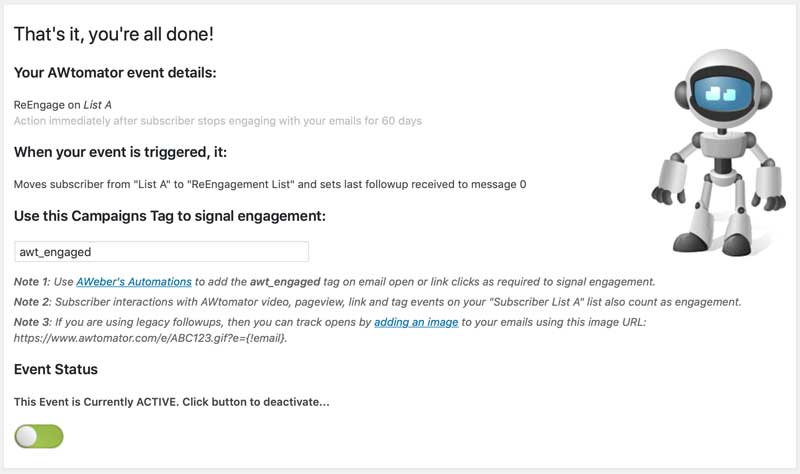
The next step is to setup the ReEngage Event that will monitor your main segmentation list (List A).
You simply create the ReEngage Event on the list in AWtomator, specify the engagement period you want (in this example, 60 days) and then set the event to move the subscriber to your reengagement / win back list (List B).
By default, the ReEngage event will track AWtomator Link Event clicks, Pageview and Video Events related to List A, but you can also use AWeber automations to add the special awt_engaged trigger Campaigns tag whenever people open and/or click links in your emails.
The awt_engaged trigger tag tells AWtomator that the subscriber has engaged with your email.
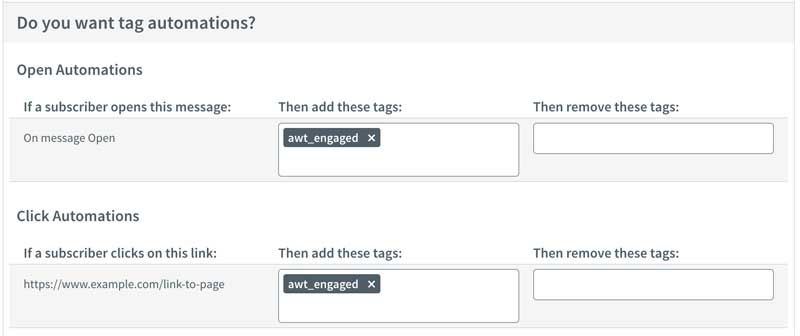
As soon as you activate the event, it will run once per day, processing any inactive subscribers it finds on your main list.
Step 3: Set up Your Automation Event
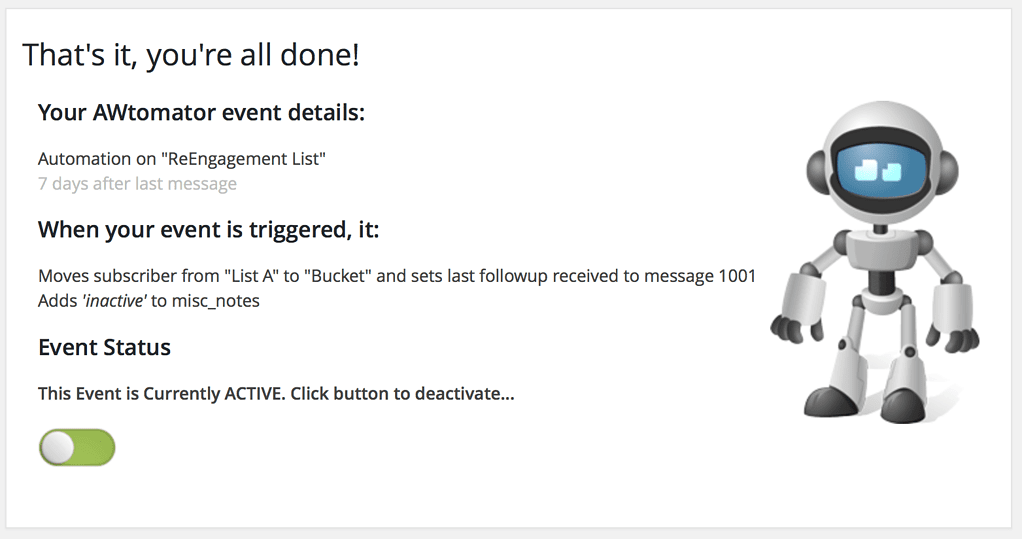
The final step is to handle subscribers who don’t click a link in the win back followup sequence (List B) and reach the last message.
Note that in the example above, I’ve set a 7 day delay on the automation event to give the subscriber some time to click a link in one of the reengagement emails before we move them to the Bucket (List D).
TIP:
Although you’ll probably just broadcast affiliate offers to everyone on your “Bucket” list, without worrying too much about the engagement / deliverability, you could also tag your subscriber in the automation event so you know more about where they have been in your funnel. You can then use the tags for segmentation, allowing you to selectively send your broadcasts later on. See this tutorial for more details.
Use AWeber?
If you use AWeber, then why not take a free trial of AWtomator and get the “Email Machine” setup in your business today.

