Table of Contents
The internet has provided countless ways for small businesses to connect with their customers, allowing them to increase their profits and grow.
Email marketing is one of the best ways, because it allows you to continually engage with your customers.
That said, it can be difficult to keep on top of the emails when you’ve got lots of subscribers on your mailing list.
This is where AWeber comes in (see also ‘What Is The Difference Between AWeber And GetResponse?’), which is an email marketing service with plenty of features that will help you manage your email campaigns.
For example, AWeber allows you to quickly and simply create emails that are attention-grabbing, increasing your engagement, while it also offers tools that will help you automate or schedule emails.
That said, your business likely has a presence on social media platforms, such as Facebook, where you have lots of other fans and customers.
As a result, it would be very handy if these fans were to receive your email campaigns too. But how can you connect your AWeber to Facebook (see also ‘Is AWeber Easy To Use?‘)?
Not to worry, we’ve got the answers! In the article below, you’ll find detailed steps on how to connect your AWeber to Facebook, allowing Facebook users to easily sign up to your AWeber email campaigns and receive your digital marketing. Read on!
How Do I Connect My AWeber To Facebook?
It’s thankfully quite an easy task to connect your AWeber to your Facebook business page, which means that you’ll be able to get the benefits of the integration in no time.
You can read about those benefits later on in our article, but for now we’re going to go through the steps to connect the two services.
It’s worth noting beforehand that you will need a Facebook business page in order to connect your AWeber to it (see also ‘How Do You Use AWeber? [Step By Step Guide]‘).
This will not work for personal Facebook profiles, so you will need to create a Facebook business page for your business first.
If you don’t know how to do this, we’ve got you covered! You’ll find the answers in the next section of our guide.
Step One: Log In To Facebook
To begin with, you’ll need to go to the Facebook website and log in to the appropriate account that’s linked to your business page.
Step Two: Add The AWeber App
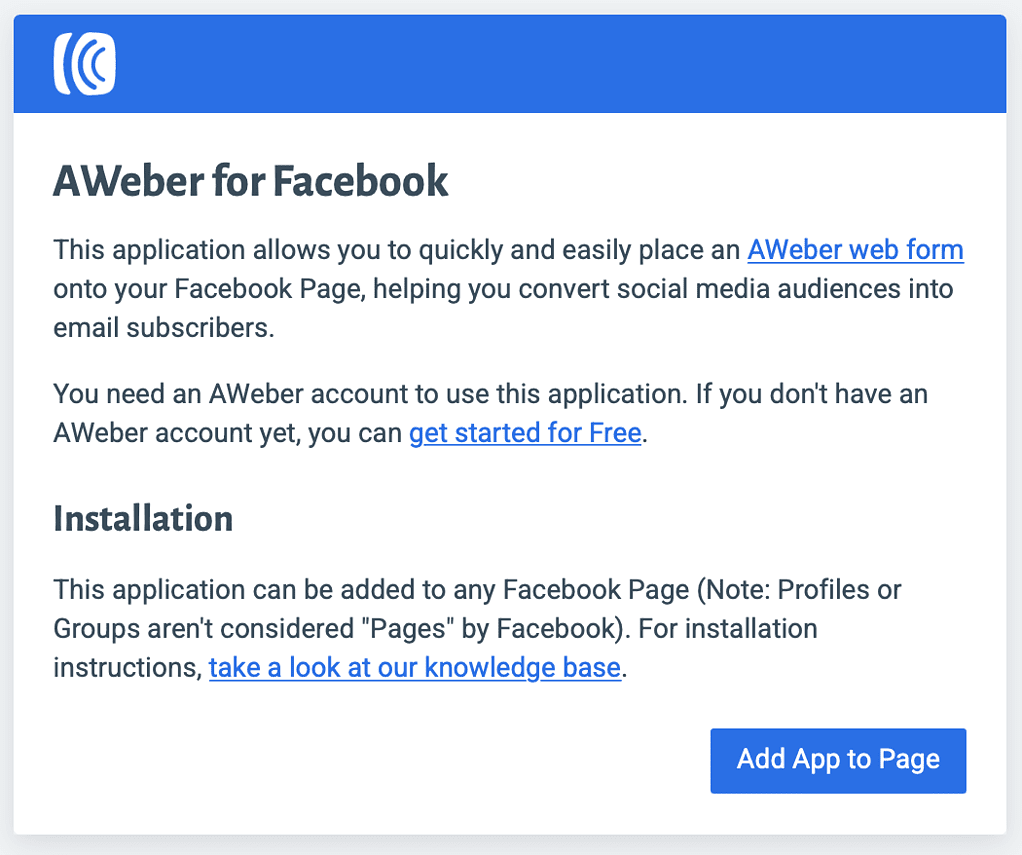
After you’ve logged in to Facebook, you’ll need to visit this webpage, where you can add the AWeber for Facebook app.
This is an official AWeber app that allows you to place an AWeber signup form on your Facebook page.
To add the app, simply click the blue button that says “Add App to Page”.
After that, you’ll be taken to Facebook and asked which Facebook page you’d like to add it to. Select the business one in question, then click “Add Page Tab”.
Step Three: Configure Email Signup
Once added, you’ll be taken to your Facebook home page. On the left of the screen, you’ll see the subheading “Pages”.
Click on it. You should be able to find your business page on the new screen that then loads.
On your business page, you’ll see some options underneath your picture and name.
Click on the one that says “More”, then select “Email Signup” from the dropdown menu.
You will then be told that the email signup page hasn’t been set up, so click the blue “Configure” button.
You now have to allow your accounts access to each other. You’ll be asked to log into your AWeber account, so enter your details and then click “Allow Access”.
The “Configure” page from before will reappear, but don’t worry, it’s supposed to!
Click “Configure” on it once more.
Step Five: Choose Your Email List
After that, you’ll be asked which list that you would like your subscribers added to. Click on the dropdown menu and select the appropriate mailing list.
This means that Facebook users interacting with the form on your Facebook business page will then have their details added to your AWeber email list (see also ‘How Many Lists Can You Have On AWeber?‘).
Step Six: Choose Your Form
Below that, you’ll have the choice to select a Webform.
Simply click on the dropdown and select the Facebook form that you’d like to use – in other words, the form that Facebook users will complete to be added to your AWeber mailing list (see also ‘How Do I Add Users To AWeber?’).
Once done, click on “Save Changes”.
That’s it! Facebook users will now be able to sign up to your AWeber mailing list straight from Facebook.
How Do I Create A Facebook Business Page?

You’ll need a Facebook business page in order to connect your AWeber account to it, because it won’t work for personal Facebook profiles.
Don’t know how? Just follow these steps!
Step One: Sign Up To Facebook
If you already have a Facebook account you can skip this step.
To begin with, go to the Facebook website and click on the green button that says “Create new account”.
Follow the instructions on screen, filling out all of the necessary information.
When you’re done, click on the “Sign Up” option. After that, you’ll need to confirm your account either by email or phone.
Step Two: Create A New Page
Next, log in to your Facebook account. Click on the “Pages” option on the left side of the screen.
This will take you to a new page. On the left of this one, you’ll see a blue button saying “+ Create New Page”. Click on it!
It’s now time to fill out your business’ details and make a Facebook page for it that you can then connect to AWeber.
To begin with, enter the name of your business as the “Page name”. Below, you’ll see an “About” section where you can write a catchy, insightful description of your business and what it does.
Additionally, you can also add a category.
Once you’ve filled out all the necessary details, click on “Create Page”. You can add images and other essential parts either now or later.
And that’s it! You now have a Facebook business page, which means you can connect your AWeber account to it with the simple steps we explained earlier.
Why Should You Connect Your AWeber To Your Facebook Page?
If you’re already using AWeber for your email marketing, and you’ve already got a Facebook page for your business with plenty of fans, then it simply makes sense to combine the two.
By connecting your AWeber account to your Facebook, it’ll allow your Facebook fans to sign up to your AWeber emailing list easily.
Simply by filling out a form on your Facebook business page, they’ll be able add their details to your mailing list, allowing you to grow your list and regularly market to them with emails that AWeber has helped you create.
The fact that users don’t even have to leave Facebook to sign up is a bonus, because jumping between sites can often deter people from doing things.
Final Thoughts
Connecting your AWeber to your Facebook will allow your Facebook fans to directly sign up to your AWeber mailing list, growing your audience and allowing you more successful marketing!


