GrooveFunnels (now called Groove) is a funnel/landing page builder, like ClickFunnels, which supports AWeber forms.
The downside, at the time of writing, is their native AWeber integration doesn’t allow tagging, nor does it pass name/email to the “thanks” page, making it hard to segment subscribers in AWeber or trigger AWtomator events.
Here’s how you can fix this.
Step 1: Save Details on Opt-In Page
Simply open your opt-in page in Groove and place the Javascript code snippet below into the Page Settings > Tracking Codes > “Include in <body> bottom” section
<script>
document.addEventListener("submit", function() {
let awt_f = document.querySelector('[data-gp-aweber-form]');
let awt_e = awt_f.querySelector('input[name="email"]');
let awt_n = awt_f.querySelector('input[name="name"]');
if (!awt_e.value) {return;}
sessionStorage.setItem('email', awt_e.value);
sessionStorage.setItem('name', awt_n.value)
});
</script>
What this snippet does is wait for the AWeber form (data-gp-aweber-form) to be submitted and then saves the contents of the name and email fields to the browser session storage area.
The browser session storage area is ideal for temporary data storage as it is emptied when the browser is closed.
Note, if your AWeber form is in a Popup, you need to add the above snippet to the page(s) where that popup can appear.
Step 2: Use Details on Other Pages
Now the user’s name and email are saved, you can retrieve these on any page where you need to fire an AWtomator event or perform some other Javascript action that needs them.
Here’s the code snippet to retrieve the details, which again can be added to the Page Settings > Tracking Codes > “Include in <body> bottom” section of the page you need them on:
<script>
window.awt_email = sessionStorage.getItem('email');
window.awt_name = sessionStorage.getItem('name');
</script>
This saves the name and email into global Javascript variables called awt_email and awt_name. If you only need email, you can exclude the window.awt_name line.
You can then fire an AWtomator Page event AFTER the above snippet, and the awt_email variable will be used automatically, for example:
<script>
window.awt_email = sessionStorage.getItem('email');
</script>

<!-- AWtomator Page Event for Testing Groove -->
<script>(function(){var e=(!window.awt_email)?location.search:'?e='+awt_email;new Image(1,1).src='//www.awtomator.com/c/abc123'+e;})();</script>
Page events can perform any AWtomator action you like – including tagging the subscriber, copying them to another list, adding them to a Facebook audience, adding a coupon and more.
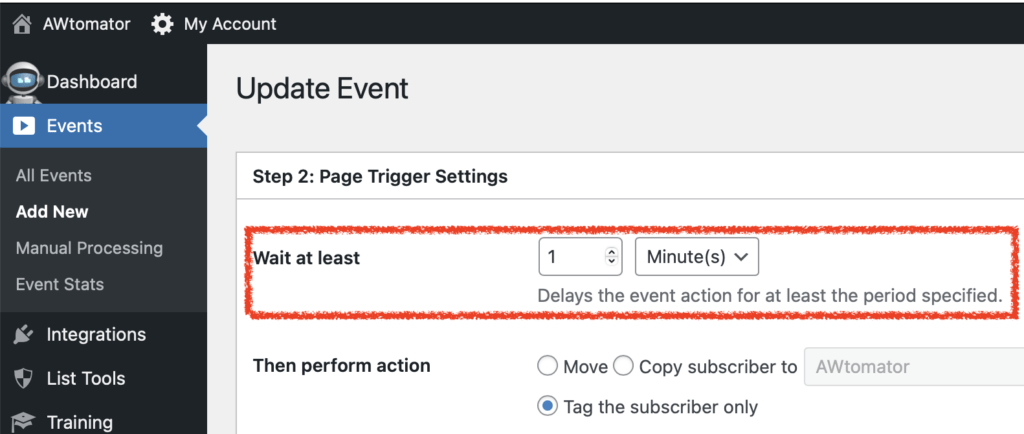
Final Tip: Add a delay to your page event
Groove’s AWeber integration will add the subscriber to your list. Your AWtomator page event will then modify that subscriber according to the event’s settings.
There is a chance that the AWtomator Page Event might “beat” the Groove integration and try to modify a subscriber that doesn’t exist yet.
To prevent such timing issues, add a 1-2 minute delay to your AWtomator page event. This ensures Groove has plenty of time to add the subscriber before you modify it.

