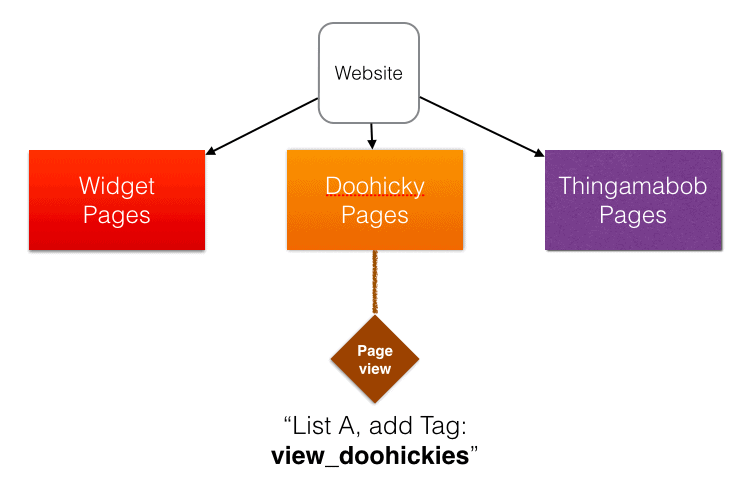
AWeber Campaigns lets you trigger a series of messages when a tag is applied to a subscriber.
AWtomator enhances AWeber Campaigns by allowing you to automatically tag a subscriber when they visit a page on your website too!
We can do this using a Page Event, which is an AWtomator event triggered by a website page view.
Here’s how to do it.
Step By Step Instructions
First, click “Add Event” from the left hand sidebar.
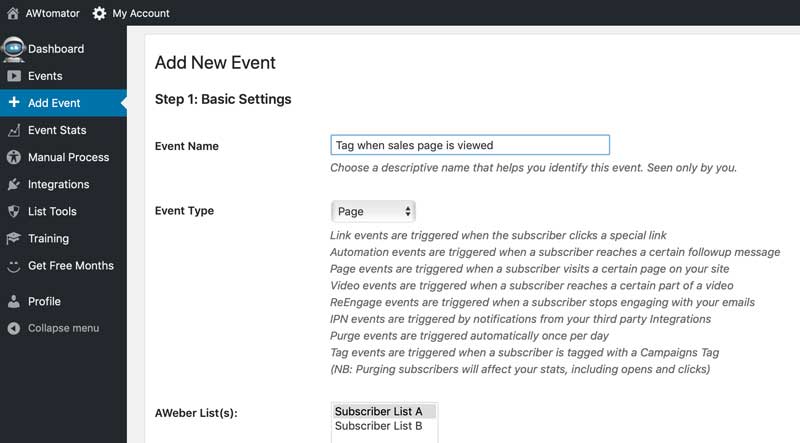
For Step 1: Basic Settings:
- Give the event a descriptive Event Name. This is seen by you only.
- Pick “Page” as the Event Type
- Select the AWeber List(s) that will be affected by this event
- Click the “Next” button to move on
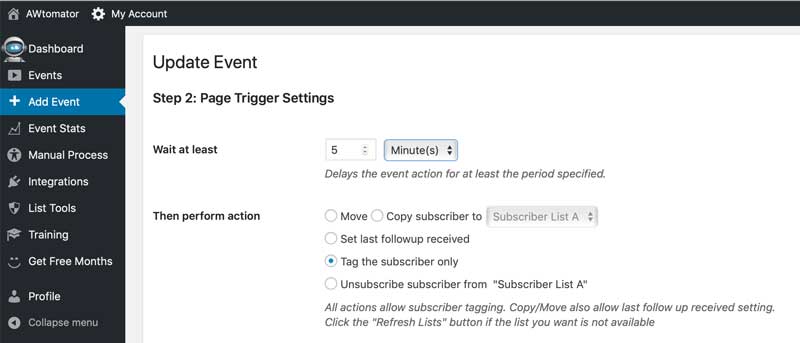
For Step 2: Page Trigger Settings:
- Use the Wait at least option to set the minimum delay before the tag is added if you don’t want the tag applied the instant the page is visited. In this example, we’re waiting 5 minutes.
- Set the Then perform action to “Tag the subscriber only”
- You can then ignore the other settings on this page and click “Next”
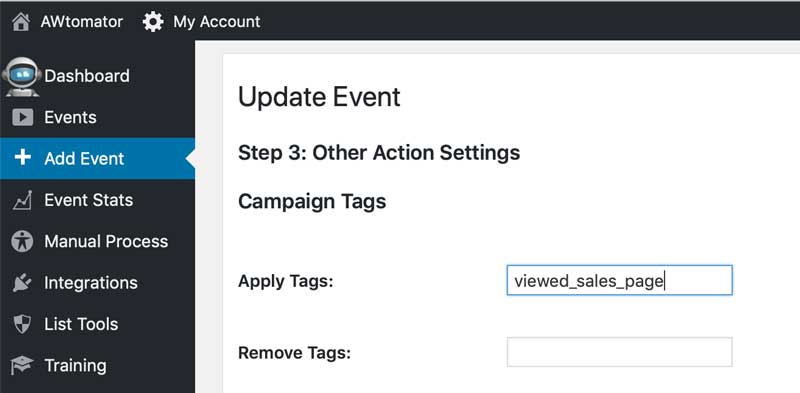
For Step 3: Other Action Settings:
- Set the Campaigns Tag you wish to set in the Apply Tags box. In this example, we’re tagging them viewed_sales_page.
- Click the “Next” button to move on
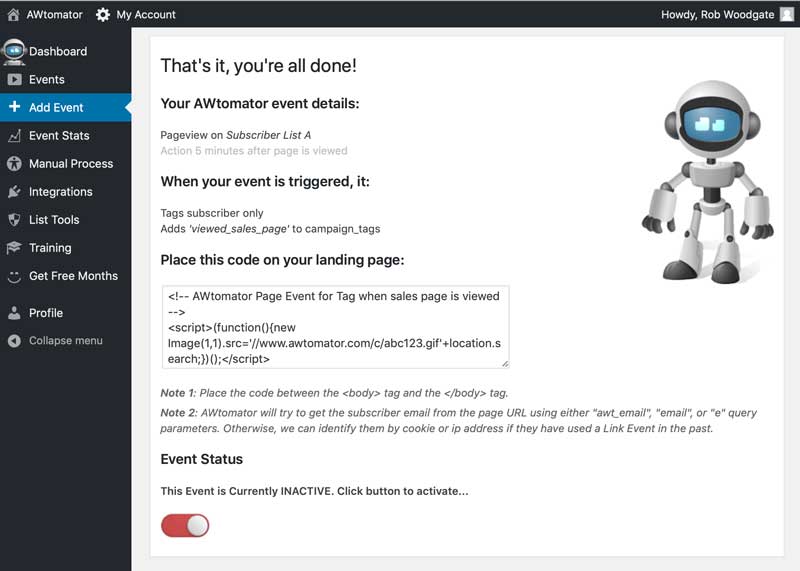
Finally, highlight the code provided and publish it to your web page between the <body> tags. Once that’s done, click the button under “Event Status” to activate the event.
That’s it! The page event will then take effect as intended and any subscriber who visits the web page containing that code snippet will be tagged with the Campaigns Tag, viewed_sales_page.
What Next?
You can now use this tag to trigger an AWeber Campaign, or suppress one from starting.
You can also use the advanced options of the Page Event to do things like:
- Add the subscriber to a Facebook Custom Audience
- Move/Copy the subscriber to another list
- Tagging a subscriber (e.g. to start a Campaign)
- Distribute a discount coupon
- Unsubscribing them from the list
- Adding/removing custom field tags or notes
Important Notes
Both Video and Page View events rely on AWtomator being able to identify the AWeber subscriber currently visiting your web page.
There are a number of ways you can feed this information to AWtomator, depending on your skill level and website / funnel software.
PRO: Set a global Javascript variable called “awt_email”
If you know the email address of the person on the page (e.g. they are logged in) then you can set a global Javascript variable called awt_email before the page event code snippet.
For example:
<script>window.awt_email='[email protected]'</script>
MODERATE: Add a URL parameter
If there isn’t an awt_email variable set, AWtomator will then look at the page URL to see if there is an email set using the “awt_email”, “email”, or “e” query parameters.
For example:
https://www.yoursite.com/page/[email protected]
Many funnels add an email parameter automatically when they redirect the user from the lead capture form to the content.
DEFAULT: Use an AWtomator Link Event
If you haven’t made the subscriber’s email available using the methods above, then AWtomator will try to identify the subscriber by cookie or ip address.
These will be set if the subscriber has used an AWtomator Link Event on that device or at that location at some point in the past.
To ensure your subscriber is identified as reliably as possible, we recommend inserting a link event as your list’s Success Page URL.
See our Pageview Event Best Practice tutorial for more details.

