In this tutorial, I’m going to show you how you can use AWtomator to share discount coupons with your subscribers. This is ideal if you run promotions as an Amazon/iTunes seller, eCommerce store or are an affiliate to a merchant who issues discount coupons.
AWtomator supports both:
- Multi Use coupons: where you share a single coupon with ALL subscribers
- Single Use coupons: where you share a unique, one-time coupon per subscriber
You can use any of AWtomator’s events to distribute coupons, so you could set a coupon when someone:
- Is tagged with a specific AWeber Campaigns Tag (Tag Event)
- Joins your list from a Facebook Lead Ad or other 3rd party integration (IPN Event)
- Joins your list via an AWeber form (Link Event at Opt-in)
- Opens an email (Tag Event)
- Clicks a link in an email (Tag Event)
- Views a page on your website (Page Event)
- Watches a certain amount of a video (Video Event)
- Stops engaging with your emails (ReEngage Event)
- Or you can process a list of subscribers using our Manual Processing option
Here’s how to set it up:
Step 1: Create an AWeber Custom Field
AWtomator saves each coupon as part of the AWeber subscriber record, so the first thing you need to do is to create an AWeber custom field to hold the coupon.
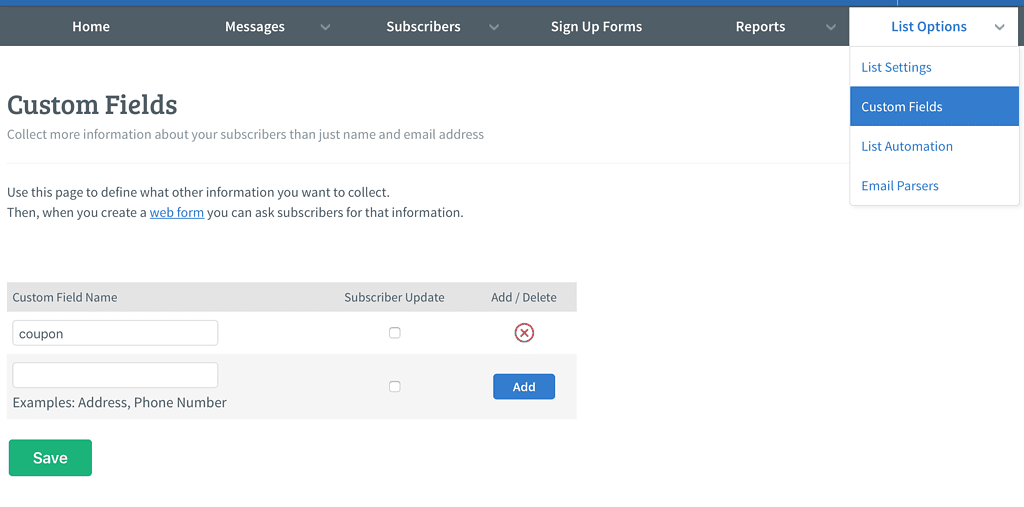
See this AWeber tutorial if you need help creating your custom field.
Step 2: Setup an AWtomator Event
Now hop over to AWtomator and select the “Add Event” menu item and choose the type of event that will trigger the allocation of a coupon. You can use any of AWtomator’s events as the trigger (see above for use cases).
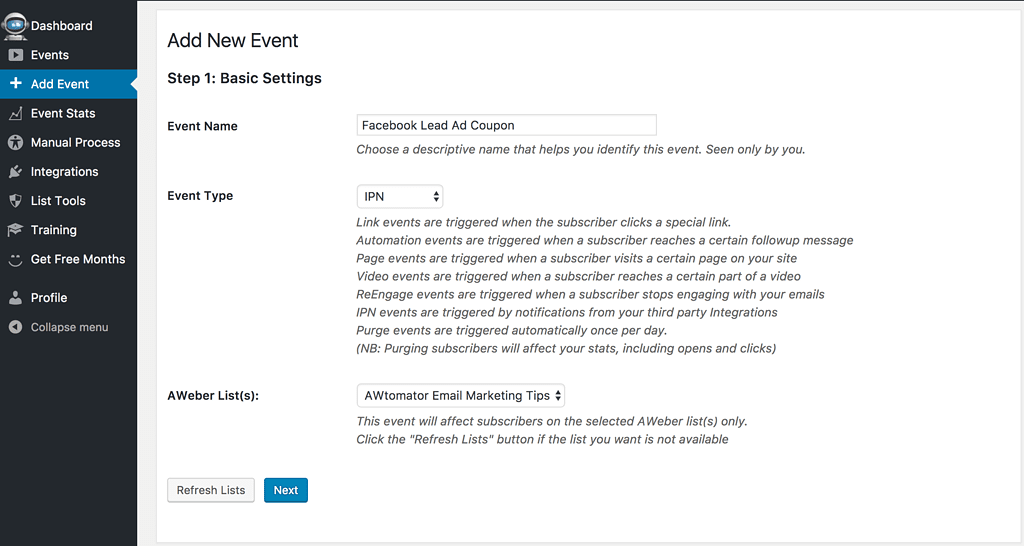
Once you’ve chosen your event type, hit “Next” and set any event-specific trigger settings and then hit “Next” to move to the “Other Action Settings” part of the event setup.

Most of the time, you’re going to want to send the coupon email automatically once it’s been allocated, so we will set a Campaigns Tag (“gotcoupon” in this example), and then use this to automatically trigger the email in the next step.
Next, scroll down the page, and you’ll also see an option to Distribute Coupon Codes:
Simply select the custom field you created earlier, so AWtomator knows where to store the coupon.

NOTE: If the custom field you created isn’t available, then hit the “Refresh Data” button at the bottom of the page to force AWtomator to get the new information from AWeber.
Next, select the type of coupon you wish to create and enter the code(s) you want to distribute:
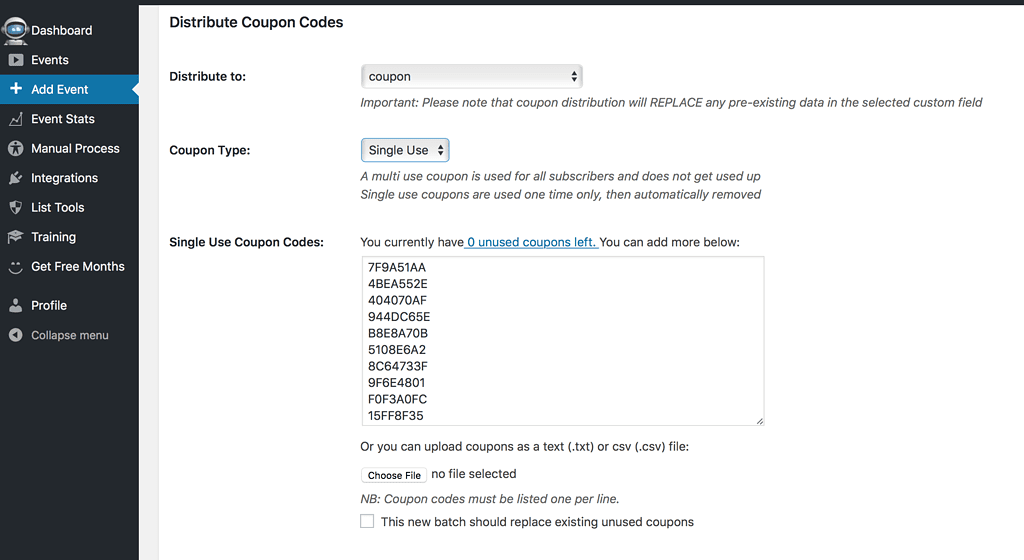
In this example, I’ve chosen “Single Use” as the coupon type, and then pasted in a list of coupon codes from my shopping cart. Single use coupons are allocated *ONCE* and then removed, so the list of coupons will be used up as subscribers trigger the event.
(Alternatively, you can choose “Multi Use”, which lets you enter ONE coupon code that will be used over and over again as subscribers trigger the event.)
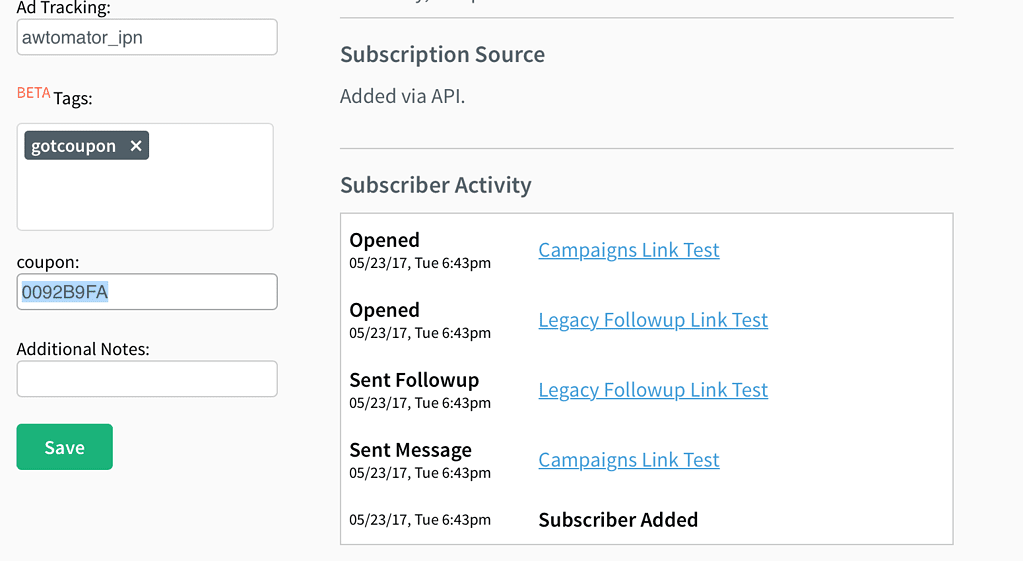
Now, when a subscriber triggers the event, AWtomator will allocate the next available coupon and save it to the custom field in their AWeber subscriber record, like so:
Step 3: Send an email containing the coupon
Now the subscriber has a coupon allocated, all you have to do is to send them an email containing the coupon custom field!
Usually, you’ll want to do this automatically right after the coupon has been set, so to achieve this, we need to create a Campaign that is triggered by the tag we set in step 2.
Here’s an example Campaign you can import:
CAMPAIGN SHARING CODE:
b0fbdf00-25cd-48fb-9128-2cf3b6508cb9
Here’s what it looks like.
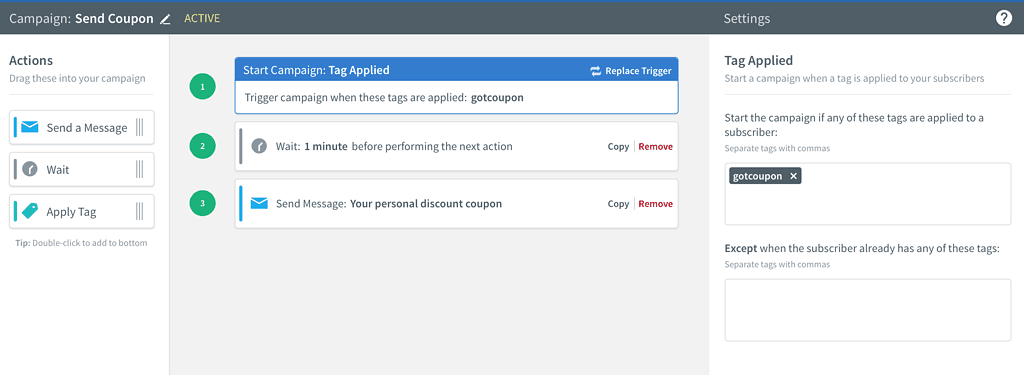
NOTE: Notice there is a small (1-2 minutes) wait before the email is sent. You’ll need this to ensure AWeber has enough time to record the coupon before sending the email.
As for the email itself, you simply insert your coupon’s custom field placeholder using the “Personalize” menu.
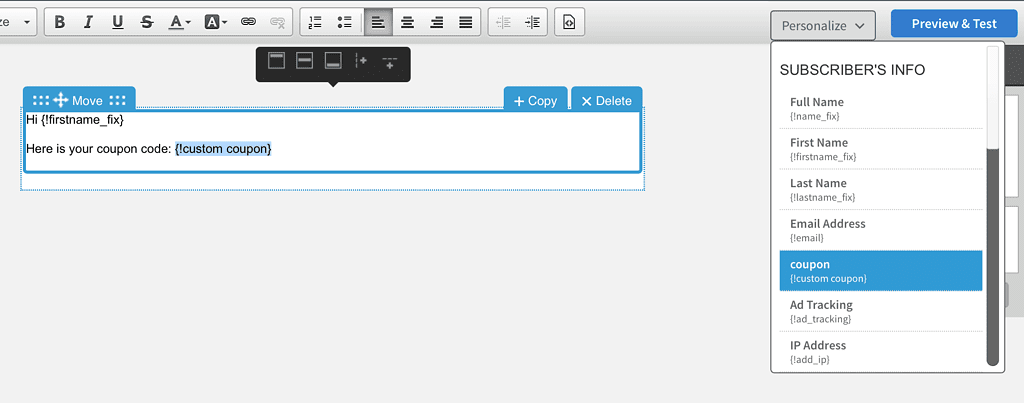
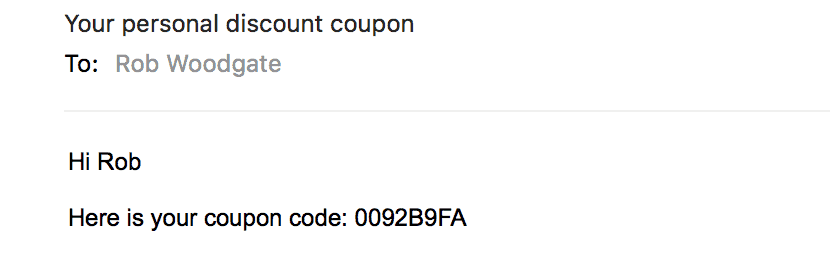
And there you go… your email will be personalised with the subscriber’s unique coupon code.
You can use this feature with any service that can deliver you a CSV or text file of coupon codes, including Amazon, iTunes and more, making coupon distribution simple, and boosting customer loyalty.
What do you think? Leave your feedback below!
And if you want to try this for yourself, grab a free trial of AWtomator.

